WWA Info Exchange

For Woodworkers By Woodworkers
It is currently Thu May 23, 2024 12:02 am

All times are UTC - 5 hours


Post new topic Reply to topic  [ 6 posts ] 
Author Message
PostPosted: Tue Jul 20, 2010 10:51 pm 
Offline
Veteran
User avatar

Joined: Fri May 12, 2006 9:37 pm
Posts: 5398
Location: Tucson, AZ
There is a method of carving into porcelain or 1/4 inch corian so you can make very authentic looking "pictures" with a CNC router. It is called a "lithophane" (or lithopane, or lithophaine, or pretty window picture) I decided to try my hand at one yesterday.

Here is the basic piece, flat... I carved the plane and the lettering and then spray painted the lettering. After the paint set for 20 mins or so I scraped it off the corian with a VERY sharp chisel. I then put the whole thing into the oven (with LOML's dubious permission) and baked it at 350 for 11 mins. This caused it to become flexible enough to form around a bucket "form"

Image
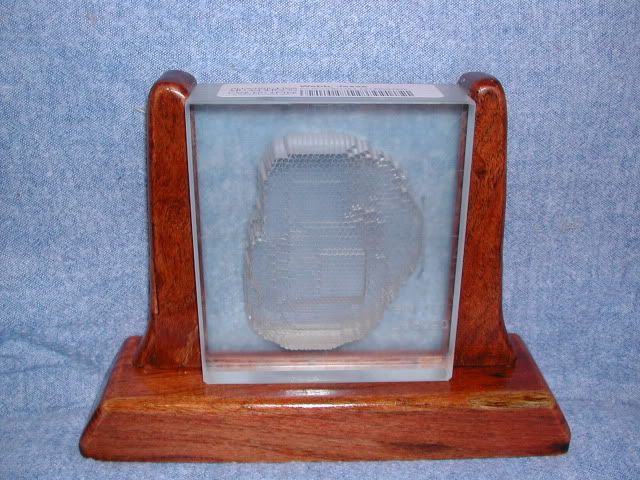
Here is what the cooled, hardened, and now curved lithophane looks without any backlighting-the pic caused the barreling, in reality the corian is evenly curved-boy these things really do look dull until they are lit


Image
And here is with....
Image
I've ordered an LED "puck" light and once it arrives I'm going to make a base, top, and back (to hold the puck light)

My brain (and google) keeps me pondering different things I can do with this... light sconces, "tiffany" type light shades, etc etc...

Here is where I could use some advice.... (and why this post is here instead of the scrap pile where non-wood-working-corian projects belong)
I Plan to rout a groove into a half-moon shaped piece of mesquite to hold the bottom and top-- I'll have to do individual templates for the top and bottom as the bucket I used as a form was not a concentric (I think that is the right term) cylinder but tapered (wider at the mouth) I hope to trace the shape of the bottom of the lithophane onto a template, cut it out, then use a router with a flush trim bearing to follow the template shape. I'll then trace and do the same with the top. I then plan to cut out the half moon shapes, lay the whole thing down on its back and trace it out for the back piece (removable)

Thoughts, suggestions, or any help is greatly appreciated... (other than to tell me to use a concentric cylinder as a form next time... I get that already!) I suppose I could reheat and rebend the piece, but a part of me is quite looking forward to the challenge (and y'alls suggestions) of making this work.

Thanks in advance,
Lawrence


More pics once I actually get some wood into this project... comments, critiques, or suggestions


Top
 Profile  
 
 Post subject:
PostPosted: Wed Jul 21, 2010 10:51 am 
Offline
Veteran
User avatar

Joined: Wed Jun 16, 2004 12:01 am
Posts: 9296
Location: Aurora CO
First, Beauty work! I want one, but with a CATM Logo, or maybe one with an A-10. :wink:

Secondly, it seems to me that using a flush trim bit would be tough to use to cut a groove, or a curved dado. I like the idea of using the piece to trace a template from, and using an over sized collar with a flush trim or straight bit would work great for the forward and trailing edges.

Unless I'm mis understanding what your talking about. :roll:

_________________
Frank
WWACOAUX#1
"I love the smell of Sawdust in the morning, it smells like, victory." Image
WWA'ers I've met: Popeye, Ed Avery, Stephen Wolf, Rockfish, Rodedon


Top
 Profile  
 
 Post subject:
PostPosted: Wed Jul 21, 2010 11:20 am 
Offline
Veteran
User avatar

Joined: Sat Nov 01, 2003 1:01 am
Posts: 7133
Location: Palmer, Iowa
Well, I have no answer, but WOW that is really cool.!!!!!

You are having a lot of fun with that machine aren't you?? :D :D

But why doesn't "curving" it stretch it out of proportion, or out of shape???

Vicki

_________________
Whoever said nothing is impossible, never tried slamming a revolving door....


Top
 Profile  
 
 Post subject:
PostPosted: Wed Jul 21, 2010 8:52 pm 
Offline
Veteran
User avatar

Joined: Sun Oct 13, 2002 12:01 am
Posts: 3593
Location: Central Texas
Wonderful job! I am really impressed with the work you are creating with this machine. Makes me want one.

I had a similar, but much simpler problem with the prostate filter from my proton treatment last year. Simpler because the filters are flat and have L-shaped projections on three edges. Filters are machined for each individual and given to the patient at the end of treatment, signed by the staff. I made the frame below out of mesquite for it, routing the base and two legs to accept the projections. The legs are joined to the base with a M/T joint.
Perhaps something along these lines would work for you.

Image

_________________
Jess
my gallery
more photos


Top
 Profile  
 
 Post subject:
PostPosted: Wed Jul 21, 2010 9:27 pm 
Offline
Veteran

Joined: Sun Nov 13, 2005 5:23 pm
Posts: 2796
Location: Montgomery,Alabama. USA
That looks good.

_________________
My Boss is a Jewish Carpenter!


Top
 Profile  
 
 Post subject:
PostPosted: Thu Jul 22, 2010 2:23 pm 
Offline
Veteran

Joined: Sun Feb 21, 1999 1:01 am
Posts: 2777
Location: Rochester MN USA
LAWRENCE: Could you use the carving router to cut the grooves for the top and bottom? If so, could you then memorialize some service information on the base (showing) and use the "corian" dust to in fill the info carving? Two thoughts- apenny apiece :wink:

_________________
Everything was new once.
newtooth 311
Rochester, MN


Top
 Profile  
 
Display posts from previous:  Sort by  
Post new topic Reply to topic  [ 6 posts ] 

All times are UTC - 5 hours


Who is online

Users browsing this forum: No registered users and 6 guests


You cannot post new topics in this forum
You cannot reply to topics in this forum
You cannot edit your posts in this forum
You cannot delete your posts in this forum
You cannot post attachments in this forum

Search for:
Jump to:  
Powered by phpBB® Forum Software © phpBB Group